
Understanding Roof Anchors
Installing permanent roof anchors for fall protection provides workers with safety during facade maintenance, window washing, or rooftop access. Whether you are installing wall-mounted systems or retrofits, OSHA and ANSI recommend installing certified roof anchors that are both secure and code-compliant.
Roof anchors play a crucial role in providing security for rooftop workers and/or facade maintenance personnel. Both horizontal and vertical workers use the same equipment, a roof anchor, which can also be referred to as a tieback anchor, a fall arrest anchor, or a fall protection anchor.
Please read our guide for designing a roof anchor and the installation process.
For this article, we’ll only show the installation for one base type per anchor category (wall anchor, retrofit, and standard tieback anchor). For more information on the various types of roof anchors and their installation process, please don't hesitate to contact us.
Installing Permanent Roof Anchors on Retrofits
Retrofits are installed by either a Pro-Bel installer or qualified personnel. Installing tieback anchors in a preexisting building is significantly more challenging than in new construction. There are structural constraints, creative solutions to ensure compatibility, and complications with the roof warranty.
How Retrofits are installed on reinforced concrete structures
Step 1: Find available concrete - The small roof covering area is removed down to the concrete deck (not applicable to wall anchors).
Step 2: Holes are drilled into or through the concrete deck to accommodate roof anchor bolts.
Step 3: Anchors are installed using bolt-through or chemical adhesive securement depending on access from below.
Step 4: The watertight integrity of the roof is restored using spun aluminum flashing and new roof covering (roof patch). Photo shows protected membrane roof.
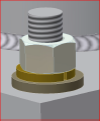
Step 5: Top of spun aluminum flashing is sealed to steel anchor using a conformable mastic tape and heat shrink rubber collar flashing.
Step 6: Close-up of anchor. The installation method is similar for both conventional roof (membrane above insulation) and protected membrane roofs (membrane below installation)
Explore our Retrofit Roof Anchors for Reinforced Concrete Structures
Retrofit: Adhesive Roof Anchor Installation
Disclaimer: Roof anchors should only be installed by qualified professionals who have been approved by Pro-Bel to handle our equipment. This guide only applies to a specific model, please reach out to Pro-Bel for additional information on installing other models.
This equipment can be used as both a fall arrest anchor or a fall protection anchor depending on how the roof anchorage system is designed.
Steps for Adhesive Roof Anchor Installation
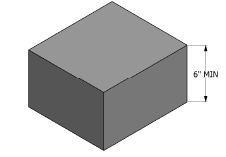
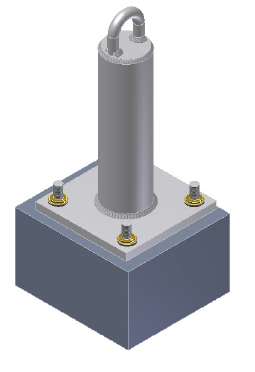
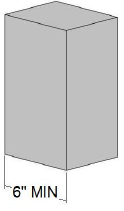
1. Check that slab thickness is over 6” deep.
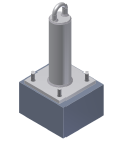
2. Place the anchor on the slab.
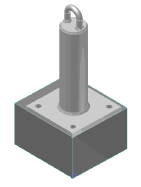
3. Trace the four base holes with a pencil and remove the anchor.
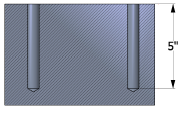
4. Drill 5” deep holes in the slab with a hammer drill and an 11/16” drill bit.
5. Clean holes with compressed air.
6. Place one adhesive capsule into each of the four holes.
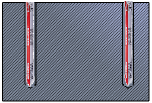
7. Using a hand drill/driver, insert a threaded rod into each hole at low speed.
8. Allow the adhesive to cure as per packaging instructions.
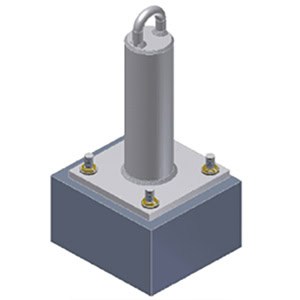
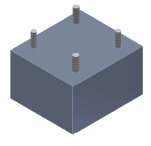
9. Set anchor on the threaded rods.
10. Place a flat washer, a lock washer and a nut on each threaded rod.
11. Tighten to 75 ft-lb with a wrench.
12. Leaving 3 to 4 exposed threads, trim the studs.

13. Deform exposed threads using a hammer.
14. Confirm that the weep hole is plugged with a plastic cap. Otherwise, plug.
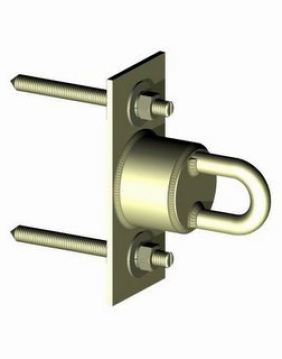
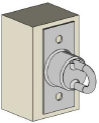
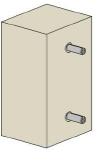
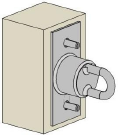
Retrofit: Adhesive Wall Anchor Installation- Extension series
Disclaimer: Roof anchors should only be installed by qualified professionals who have been approved by Pro-Bel to handle our equipment. This guide only applies to a specific model, please reach out to Pro-Bel for additional information on installing other models.
This equipment can be used in all applications, fall arrest, tie-back or direct rigging for suspended access depending on how the roof anchorage system is designed.
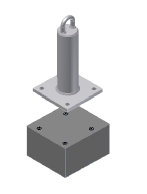
Steps for Adhesive Wall Anchor Installation
1. Check that wall thickness is over 6” deep.
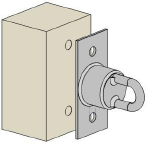
2. Place the anchor on the wall.
3. Trace the four base holes with a pencil and remove anchor.
4. Drill 5” deep holes in the wall with a hammer drill and an 11/16” drill bit.
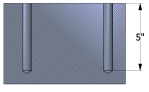
5. Clean holes with compressed air.
6. Place one adhesive capsule into each of the four holes.
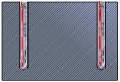
7. Using a hand drill/driver, insert a threaded rod into each hole at low speed.
8. Allow the adhesive to cure as per packaging instructions.
9. Set anchor on the threaded rods.
10. Place a flat washer, a lock washer and a nut on each threaded rod.
11. Tighten to 75 ft-lb with a wrench.

12. Leaving 3 to 4 exposed threads, trim the studs.
13. Deform exposed threads using a hammer.